
Parametric Constraints in AutoCAD
- Lesson 2-1PLANNING A PROJECT - OFFICE FLOOR PLAN
- Lesson 2-2INTRODUCTION TO BLOCKS - CREATING AND INSERTING (DYNAMIC BLOCKS)
- Lesson 2-3ALIGN AND ROTATE COMMANDS
- Lesson 2-4ATTRIBUTES - NON-GRAPHICAL INFORMATION
- Lesson 2-5HATCHING - FILLING AREAS
- Lesson 2-6WORKING WITH TEXT
- Lesson 2-7POLYLINES
- Lesson 2-8LAYOUT TABS - PLOTTING AND PAPER SPACE
- Lesson 2-9PARAMETRIC CONSTRAINTS
- Lesson 2-10ELEVATION DRAWINGS
- QUIZ FOR LEVEL 2 - 47 QUESTIONS
Topics covered in this Lesson:
Parametric Geometric Constraints | Dimensional Constraints
This is a new feature in AutoCAD 2010.
Parametric constraints allow you
to force an object to behave the way you want it to. If you need a line to remain vertical
at all times, you can set a constraint on
it to do just that. Need 2 circles to remain the same diameter? How about a circle for a
bolt that must stay 1/2" diameter? No problem with constraints. These are just some
examples that will make it easier to control
your drawing.
Constraints can be divided into two groups and are on the Parametric Tool Panel:
| COMMANDS | ICONS | RESULTS |
|---|---|---|
| Geometric Constraints |  |
Constrains a object based on geometric properties : vertical, horizontal, etc |
| Dimensional Constraints | 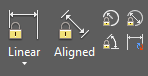 |
Constrains an object based on a set length or radius. |
| Display Constraints | 
|
Use this icons to turn the visibility of the constraints on or off. |
| Delete Constraints | 
|
Use this icon or the DELCON / DELC command to remove the constraints from the object. |
This tutorial is not going to explain each one, but jut show you how they're used and then you can explore the others and learn how they work. This may not be something that you use in everyday drafting, but it can very useful at times.
Geometric Constraints
Let's start with an easy one. Draw 2 random lines without having Ortho on.
Click on the
Parallel Constraint icon ![]() and then select one
line and then the other. The second line should now be parallel with the first.
and then select one
line and then the other. The second line should now be parallel with the first.
The angle of the first line will be the constraint put upon the second line. Now if you try moving one of the lines around, you'll find that the two will stay parallel. If you highlight one, the other becomes highlighted. You also now have constraint indicators next to the objects.

Most of the geometric Constraints work the same way. Select an object to create the constraint and then select another to match. You can only constrain 2 objects at a time, but you can use multiple constraints to constrain multiple objects. If you copy one of the constrained objects, the constraint does not copy with it.
Try out a bunch of the geometric constraints before moving on to dimensional constraints. Notice how the procedure is pretty much the same. See what happens when you add a new constraint to an object that already has a constraint. Some will work, some won't - try to figure out why.
Dimensional Constraints
Dimensional constraints are different from what you just worked with. Instead of making a line vertical (for example), you can make a line 10 units long and make it stay that way until you change the constraint. You can have more than one dimensional constraint on certain objects.
Draw a random angled line on the screen. Pick on the Aligned constraint icon.  Pick two points on the line. Notice that
even if you have your Osnaps off, you can only pick the endpoints and midpoint on the line.
After selecting the 2 points, you can now enter a length that you want the distance between
those points to be.
Pick two points on the line. Notice that
even if you have your Osnaps off, you can only pick the endpoints and midpoint on the line.
After selecting the 2 points, you can now enter a length that you want the distance between
those points to be.

With the constraint still highlighted, enter a number. d3 in this example refers to the 3rd
dimensional constraint in the drawing. If you added a constraint from end to middle, add
another from end to end (or vice versa). Notice
that the constraint will be double the first one. If you change one, the other will change.
Mixing it up
You'll notice in the geometric constraints panel,
there is one for equal. this can used to
make objects the same size. In this example, draw 2 different sized circles. Make one a
dimensional constraint for diameter. now use the Equals constraint
 to make the other one the same.
Imagine using this when you are designing a part with holes to be drilled. If the part isn't finalized yet, the hole size might change. Using the Equals constraint would allow to change one and make the others the equal at the same time. Draw four random sized circles and make them constrained to the same equal size diameter. Then use grips to change the diameter on one. Add a dimensional constraint to keep them the same distance apart.
If you use a lot of constraints in a drawing, your screen can get cluttered up very fast. Use the display tools to turn their visibility on or off.

This tutorial has shown you the basics of working with parametric constraints. The are simple to use, easy to delete if you don't need them any more, and they can be a great time saver. Practice with them. Go over some previous exercises using constraints.
Video: Constraints in AutoCAD
You Scored:

Fun fact: AutoCAD LT was also released in 1993 as a version of AutoCAD with limiltess capabilities and lower costs.
Please support
MyCADsite.com
Give a donation!
Donate

- To cover this months server costs
- Exceeding amounts will go to creating new content
- Even a penny will help
Did you like the lesson? ❤️